Creating an S-video adaptor
Creating adaptors for a S-video style connector
Reversing cameras with S-video style connectors are relatively rare. They can pose a big problem if you do not have the old camera as one of the pins in the plug is often connected to the outer metal of the casing. Using an off the shelf S-video cable can result in a situation where the 12v gets shorted out. To see if an adaptor will work on your cable you need to test for continuity between the outer metal of the plug and each of the 4 pins. If you have then seek our help. We do have some low cost adaptors for cameras fitted to Elddis motorhomes and Veba camera systems.
The S-video connector comes in 3 styles. One is a plain push in variety and the other two have a locking ring like this one:-
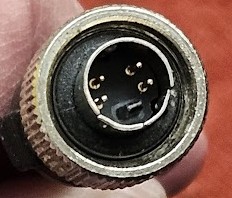
These locking rings can vary on their diameter.
If you are making an adaptor the first stage is to cut the plug off your camera and strip back the outer insulation to view the wiring.
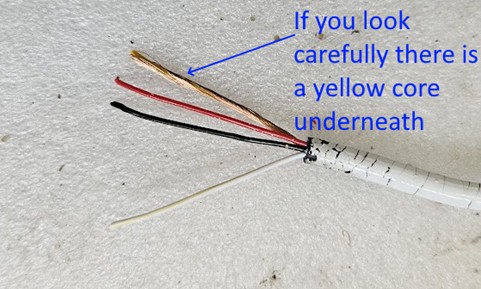
On this cable we have red, black, white and a yellow under a bare shield.
Sometimes there is no black wire so you treat the bare shield as the black. We sell a CAB041 which is a 4 pin aviation connector on a length of cable. The picture below shows its insides.
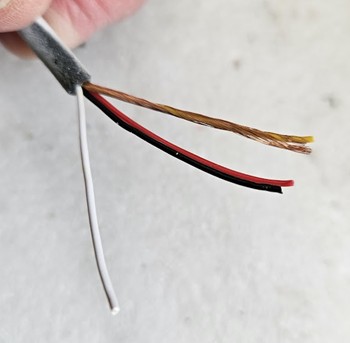
The yellow video has a bare shield around it. To make the adaptor you need to connect colour to colour with the black core of CAB041 joined to the bare shield/black core of your camera lead. You will need a length of heat shrink to cover the whole joint which is slide up the cable first.

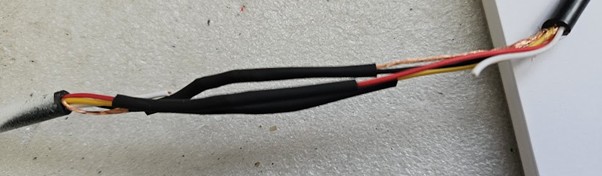
Then use some heat shrink on each core joining colour to colour.
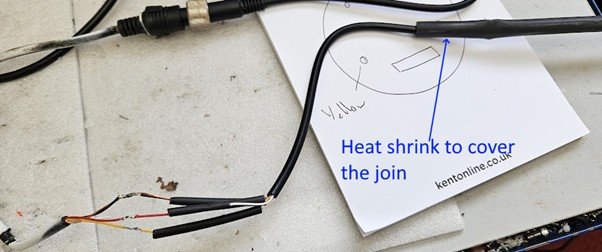
At this stage you have joined yellow to yellow, white to white, red to red and black/bare to black/bare or just bare if your camera lead has no black. If you slide the heat shrink over the joins you can test it works. At the moment we have not shrunk the heat shrink.
Assuming it works when you test it use a hot air gun to shrink the tubing over the individual wires.

The last job is to slide the heat shrink you put up the cable down to cover the join and then heat shrink that.
In theory you now have a working adaptor that will allow our 4 pin aviation cameras to fit the S-video cable you have. Things can go wrong! Sometimes the video is on the white. Very rarely white is used as the negative. Your S-video cable might be faulty. 95% of the time this will work for you.